
1. The first thing you’re going to want to do is to open up your web browser.
I’m using Chrome for this tutorial.
2. In the search bar, you can type in Lately Social.
You can also type in lately social calm in your URL – http://latelysocial.com/. Once you arrive on the Lately Socials homepage, can browse around here and just look at the features that they offer and what’s included.
3. Then you can sign up for the free account.
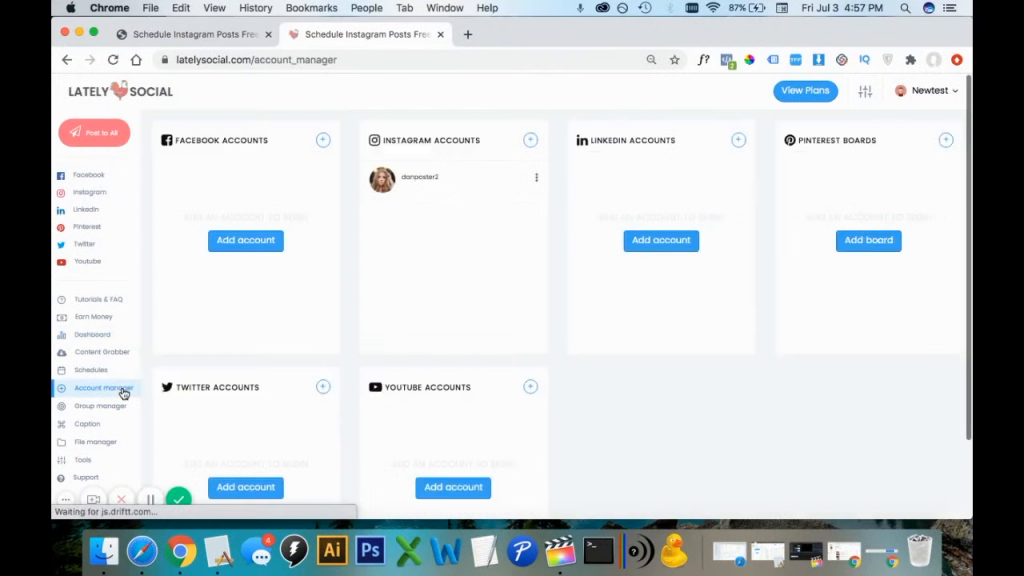
Once you are logged in signed up and logged in you’ll land on this dashboard page from the dashboard you’re going to want to go down to account manager. This is the page where you can connect all your social media accounts that you want to post. My Instagram account is already connected to connect. Your account it’s super easy you can just click “Add Account” the Add Account button up here or there’s a there’ll be another blue button like this one. For the Instagram accounts after your account is connected you could head over to the Instagram post page once you’re on the Instagram post page.
4. The first step you’re going to want to do is check off the box next to the username that you want to post to.
There are a few different options for posting to Instagram. In this option, we’re going to use the timeline tab which is basically just a regular Instagram feed.
5. Upload photos
To upload your photo you can use one of these buttons. The file manager is the cloud storage on lately social. For example, if your photos already on your file manager page, you can just import it from the cloud storage. Here this button will allow you to upload from your computer, Google Drive, and then this one is Dropbox.
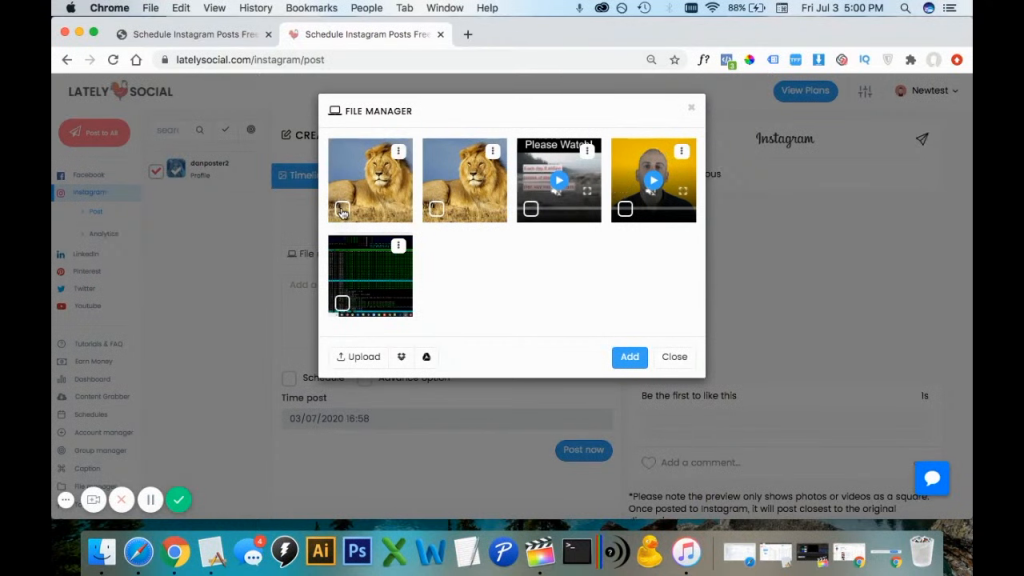
I do have a photo already saved in my file manager so I’m just gonna go use that one this picture of a lion. We can select that as you can see there’s a preview over here on the right-hand side and then let’s run through some of these options.
6. Add caption
In this box we can add a caption over on this side we have the ability to choose an emoji import a saved caption and save this current caption to use for later.
7. Select time and date
Down here if we click on schedule the schedule box we can select a time and date we would like to go the post.
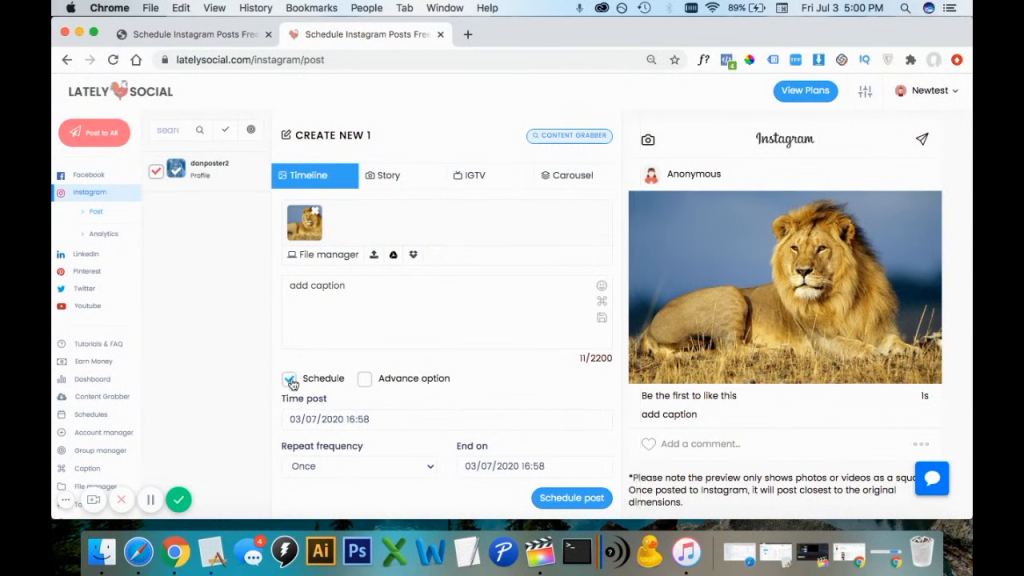
To go out in the future and this is automatic there’s no notification – except for that one. It’s great and this advanced option allows us to enter a location and a first comment of the post, but for this tutorial, I’m just gonna use a basic post uploading a photo.
8. Save settings
I have my common checked off the photo is uploaded caption and then we can just click this “post Now” button. As you can see the photo was posted to my Instagram account successfully.
If you have any questions on this process or getting started feel free to leave a comment below. I’ll answer as soon as possible.


